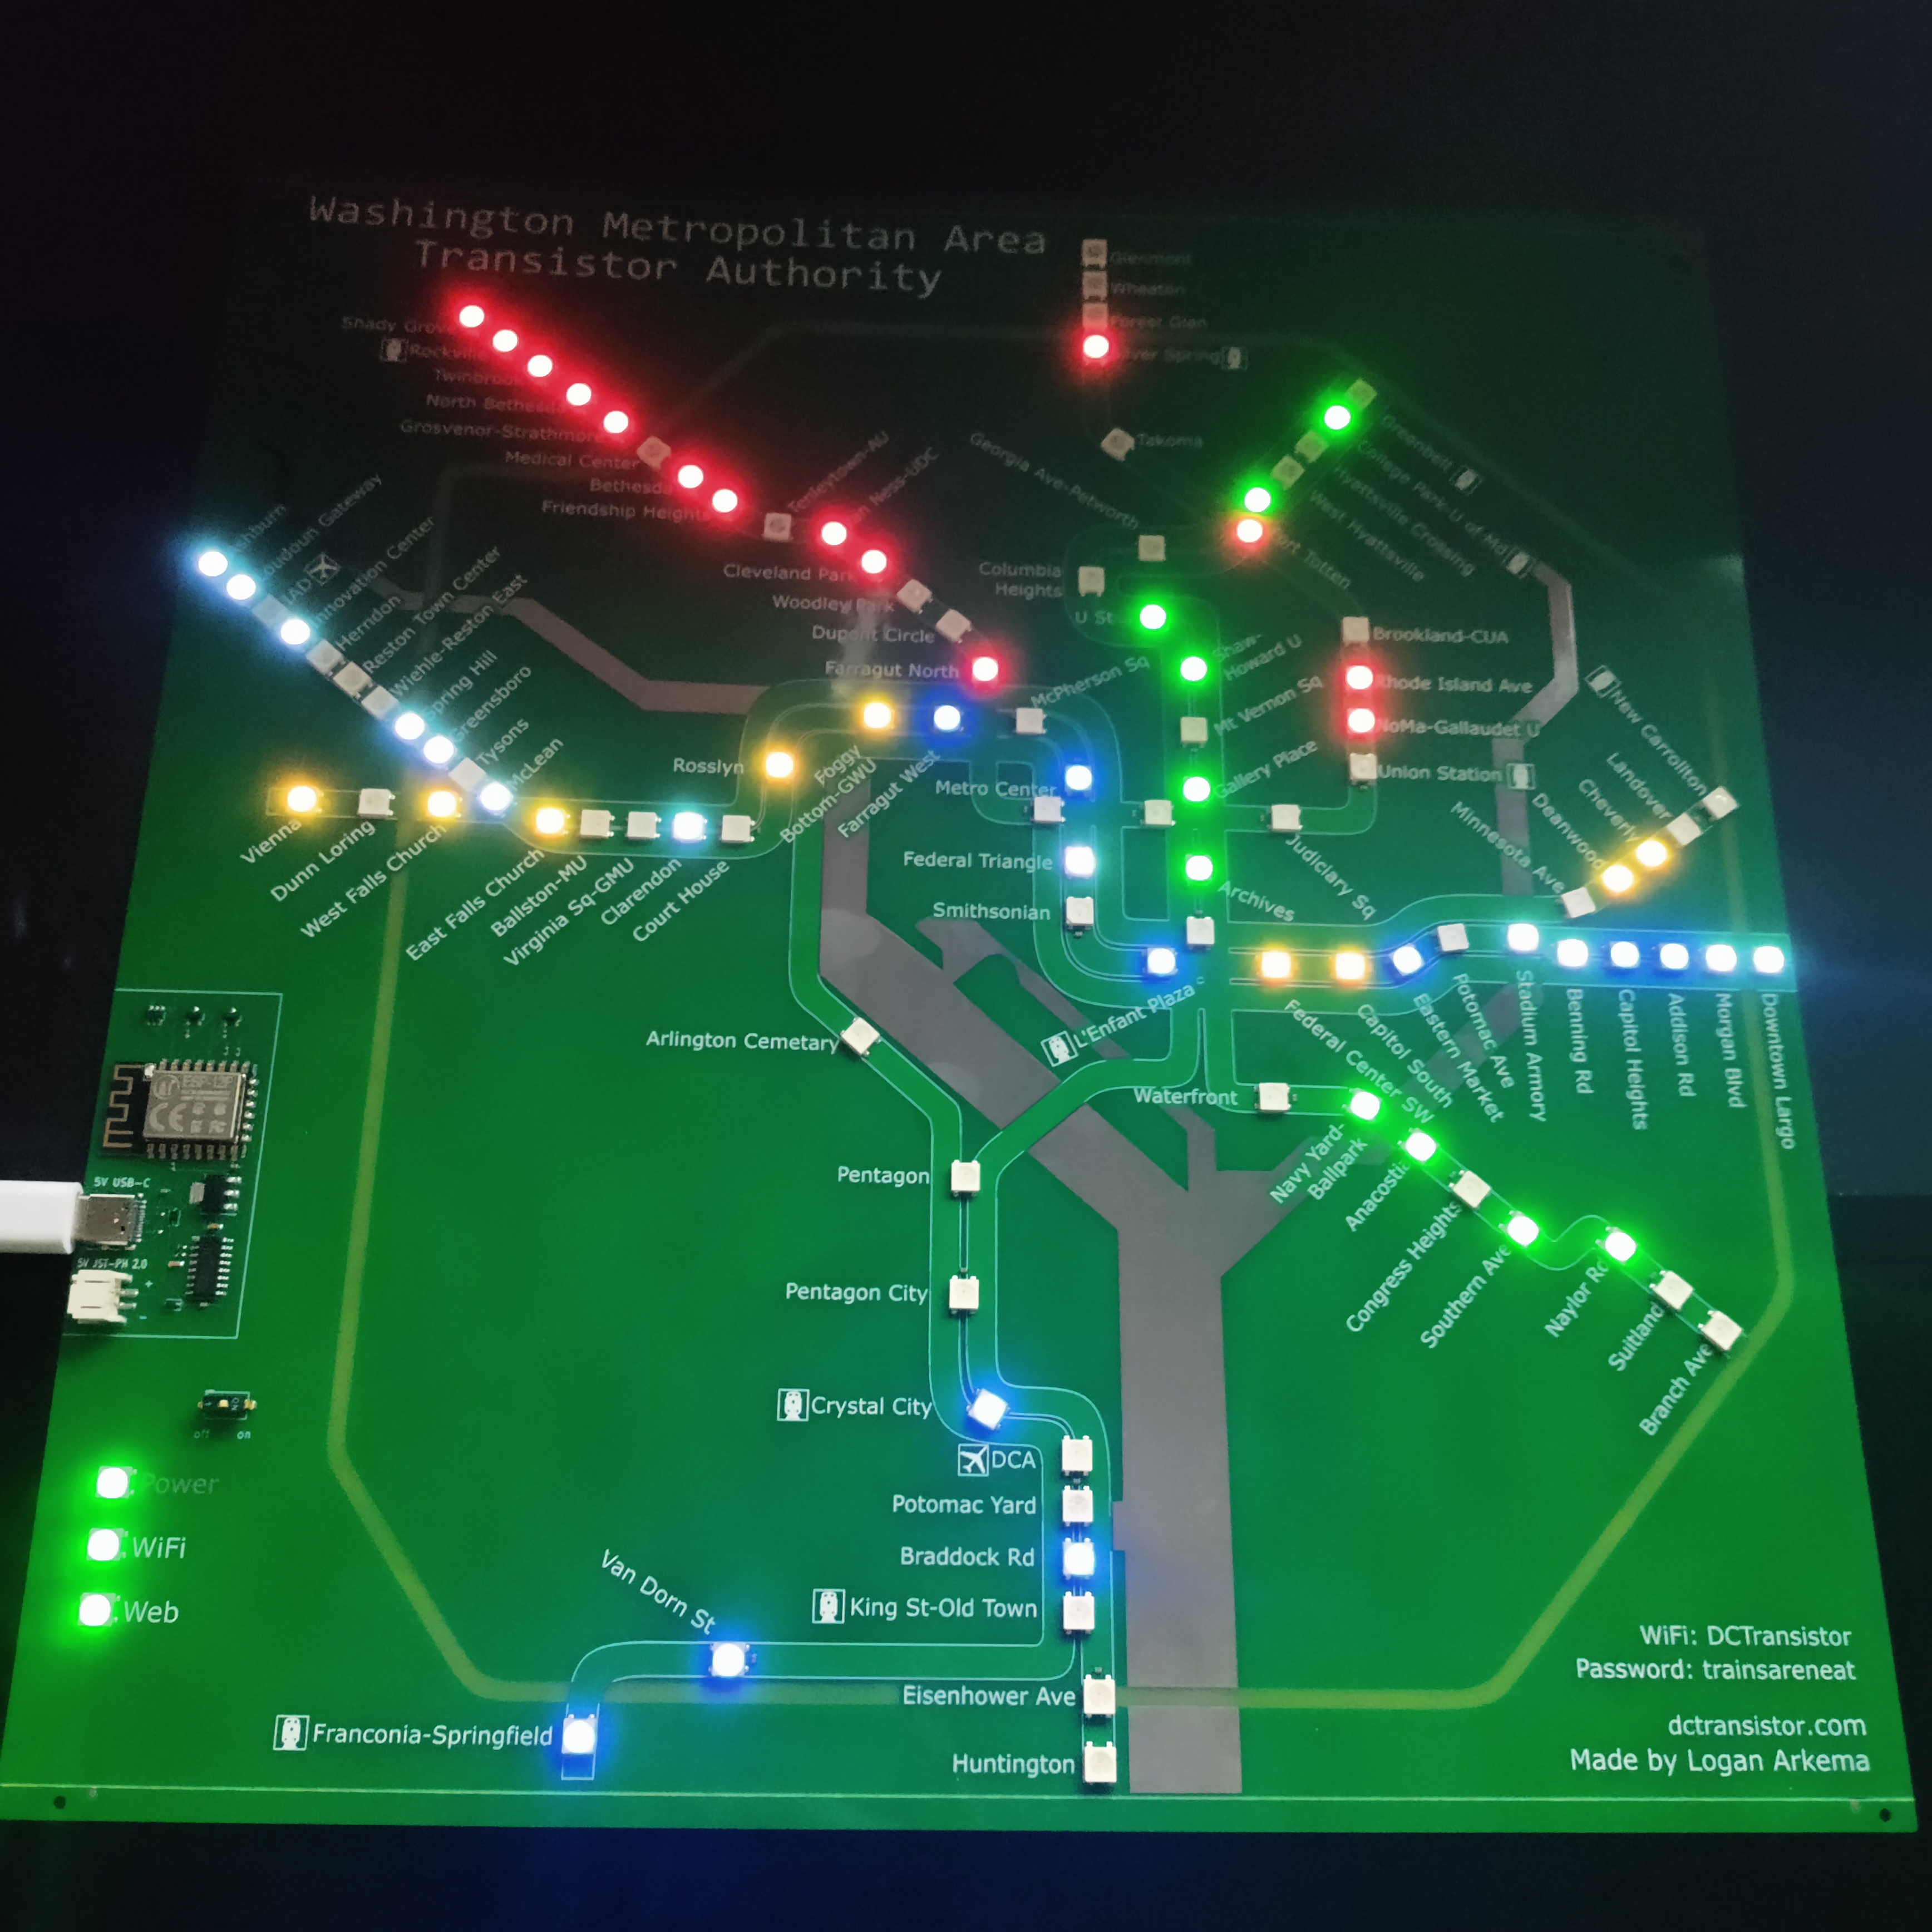
Setup Your Board
Getting started with your DCTransistor board
Setup Instructions
To get your board to work, you only need to provide it with power and WiFi information.
In short:
- Plug your board into a 5V wall / phone charger, or a computer, with a USB-C cable
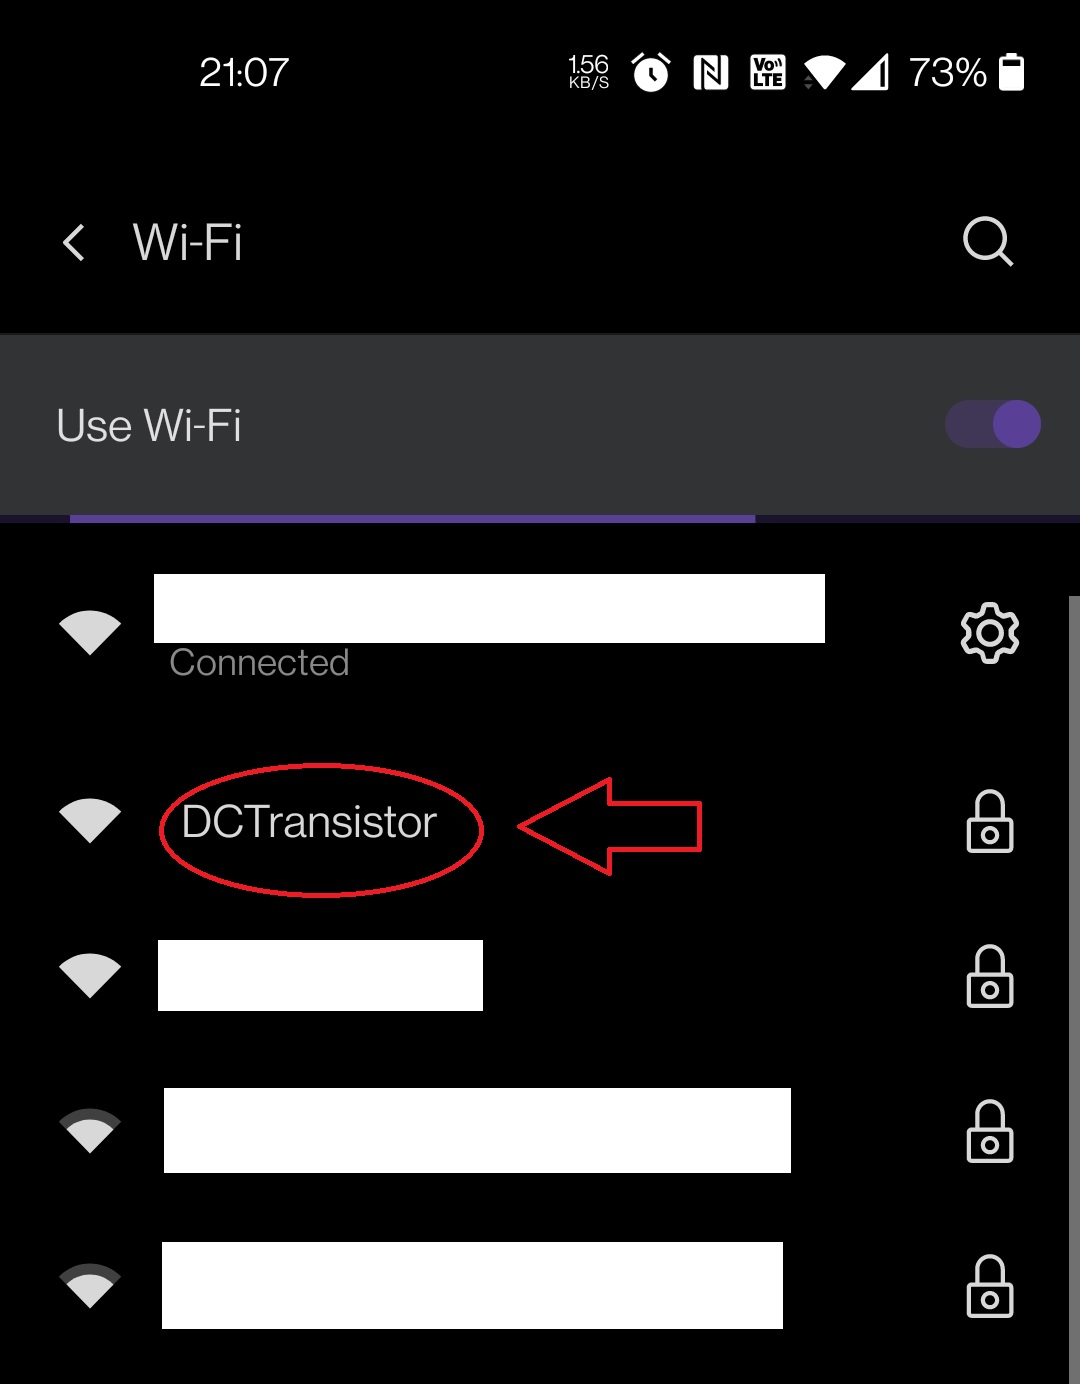
- Join the
DCTransistorWiFi network and follow the WiFi setup prompts
Power
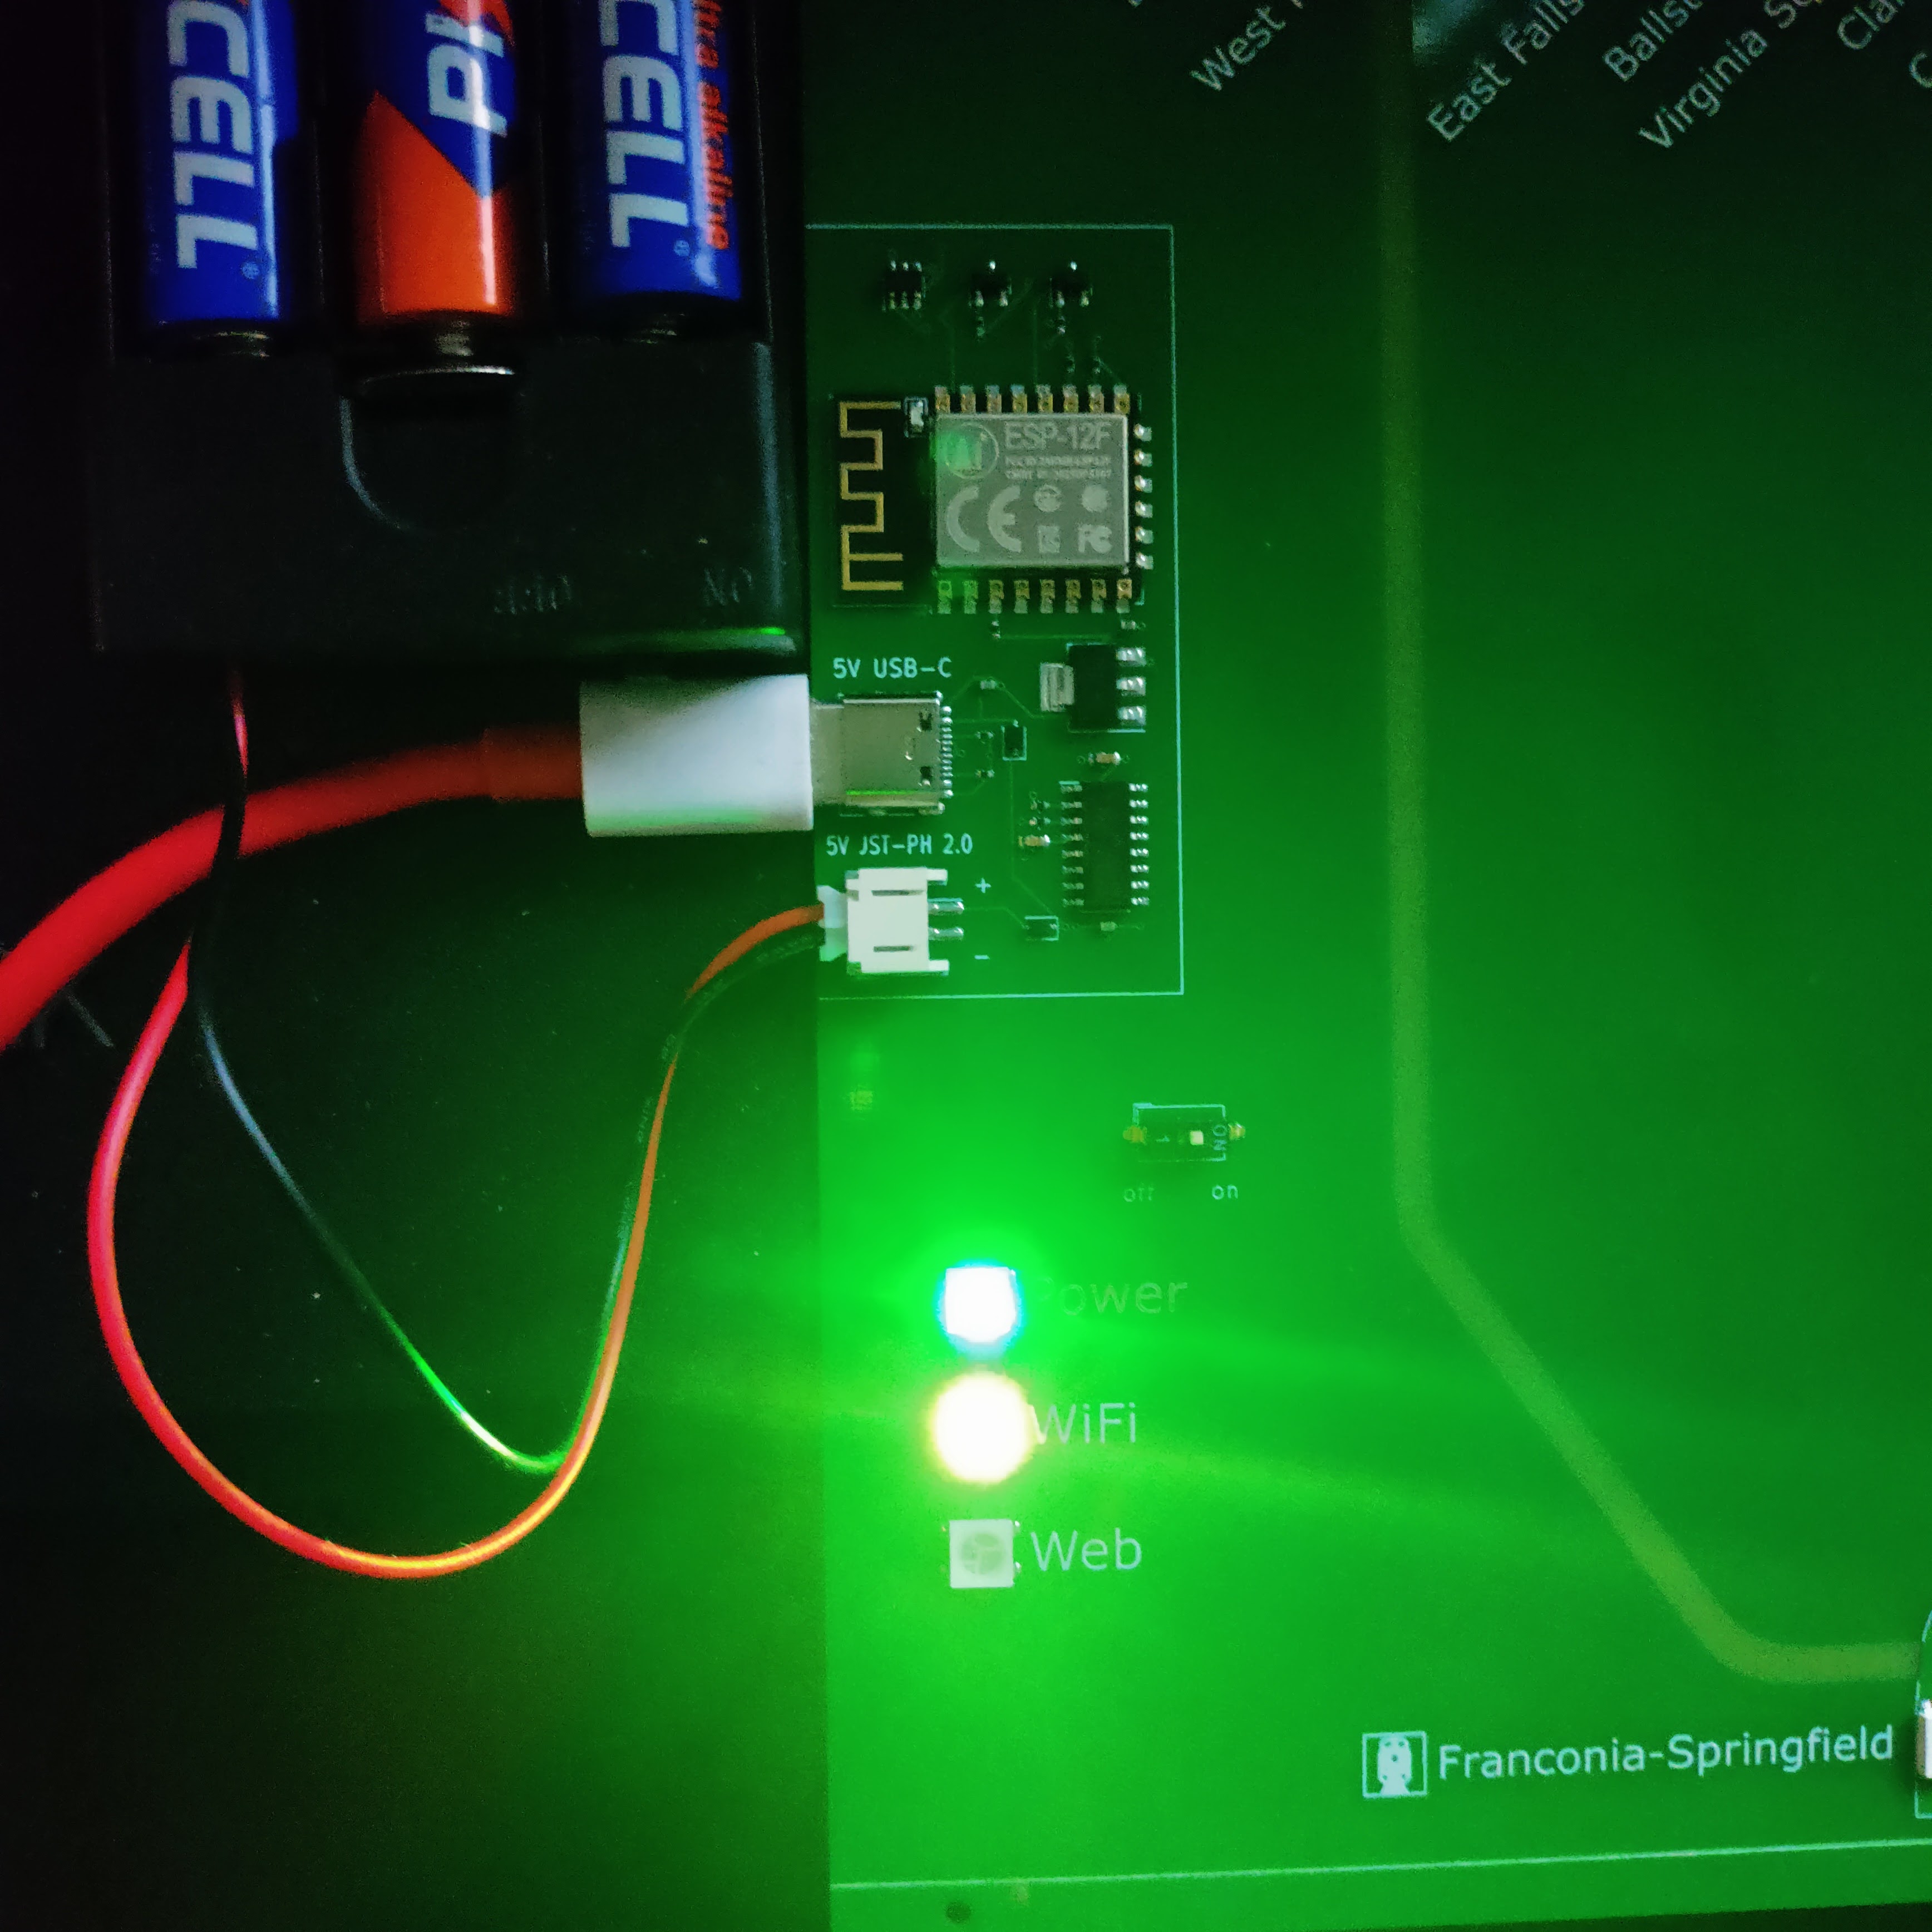
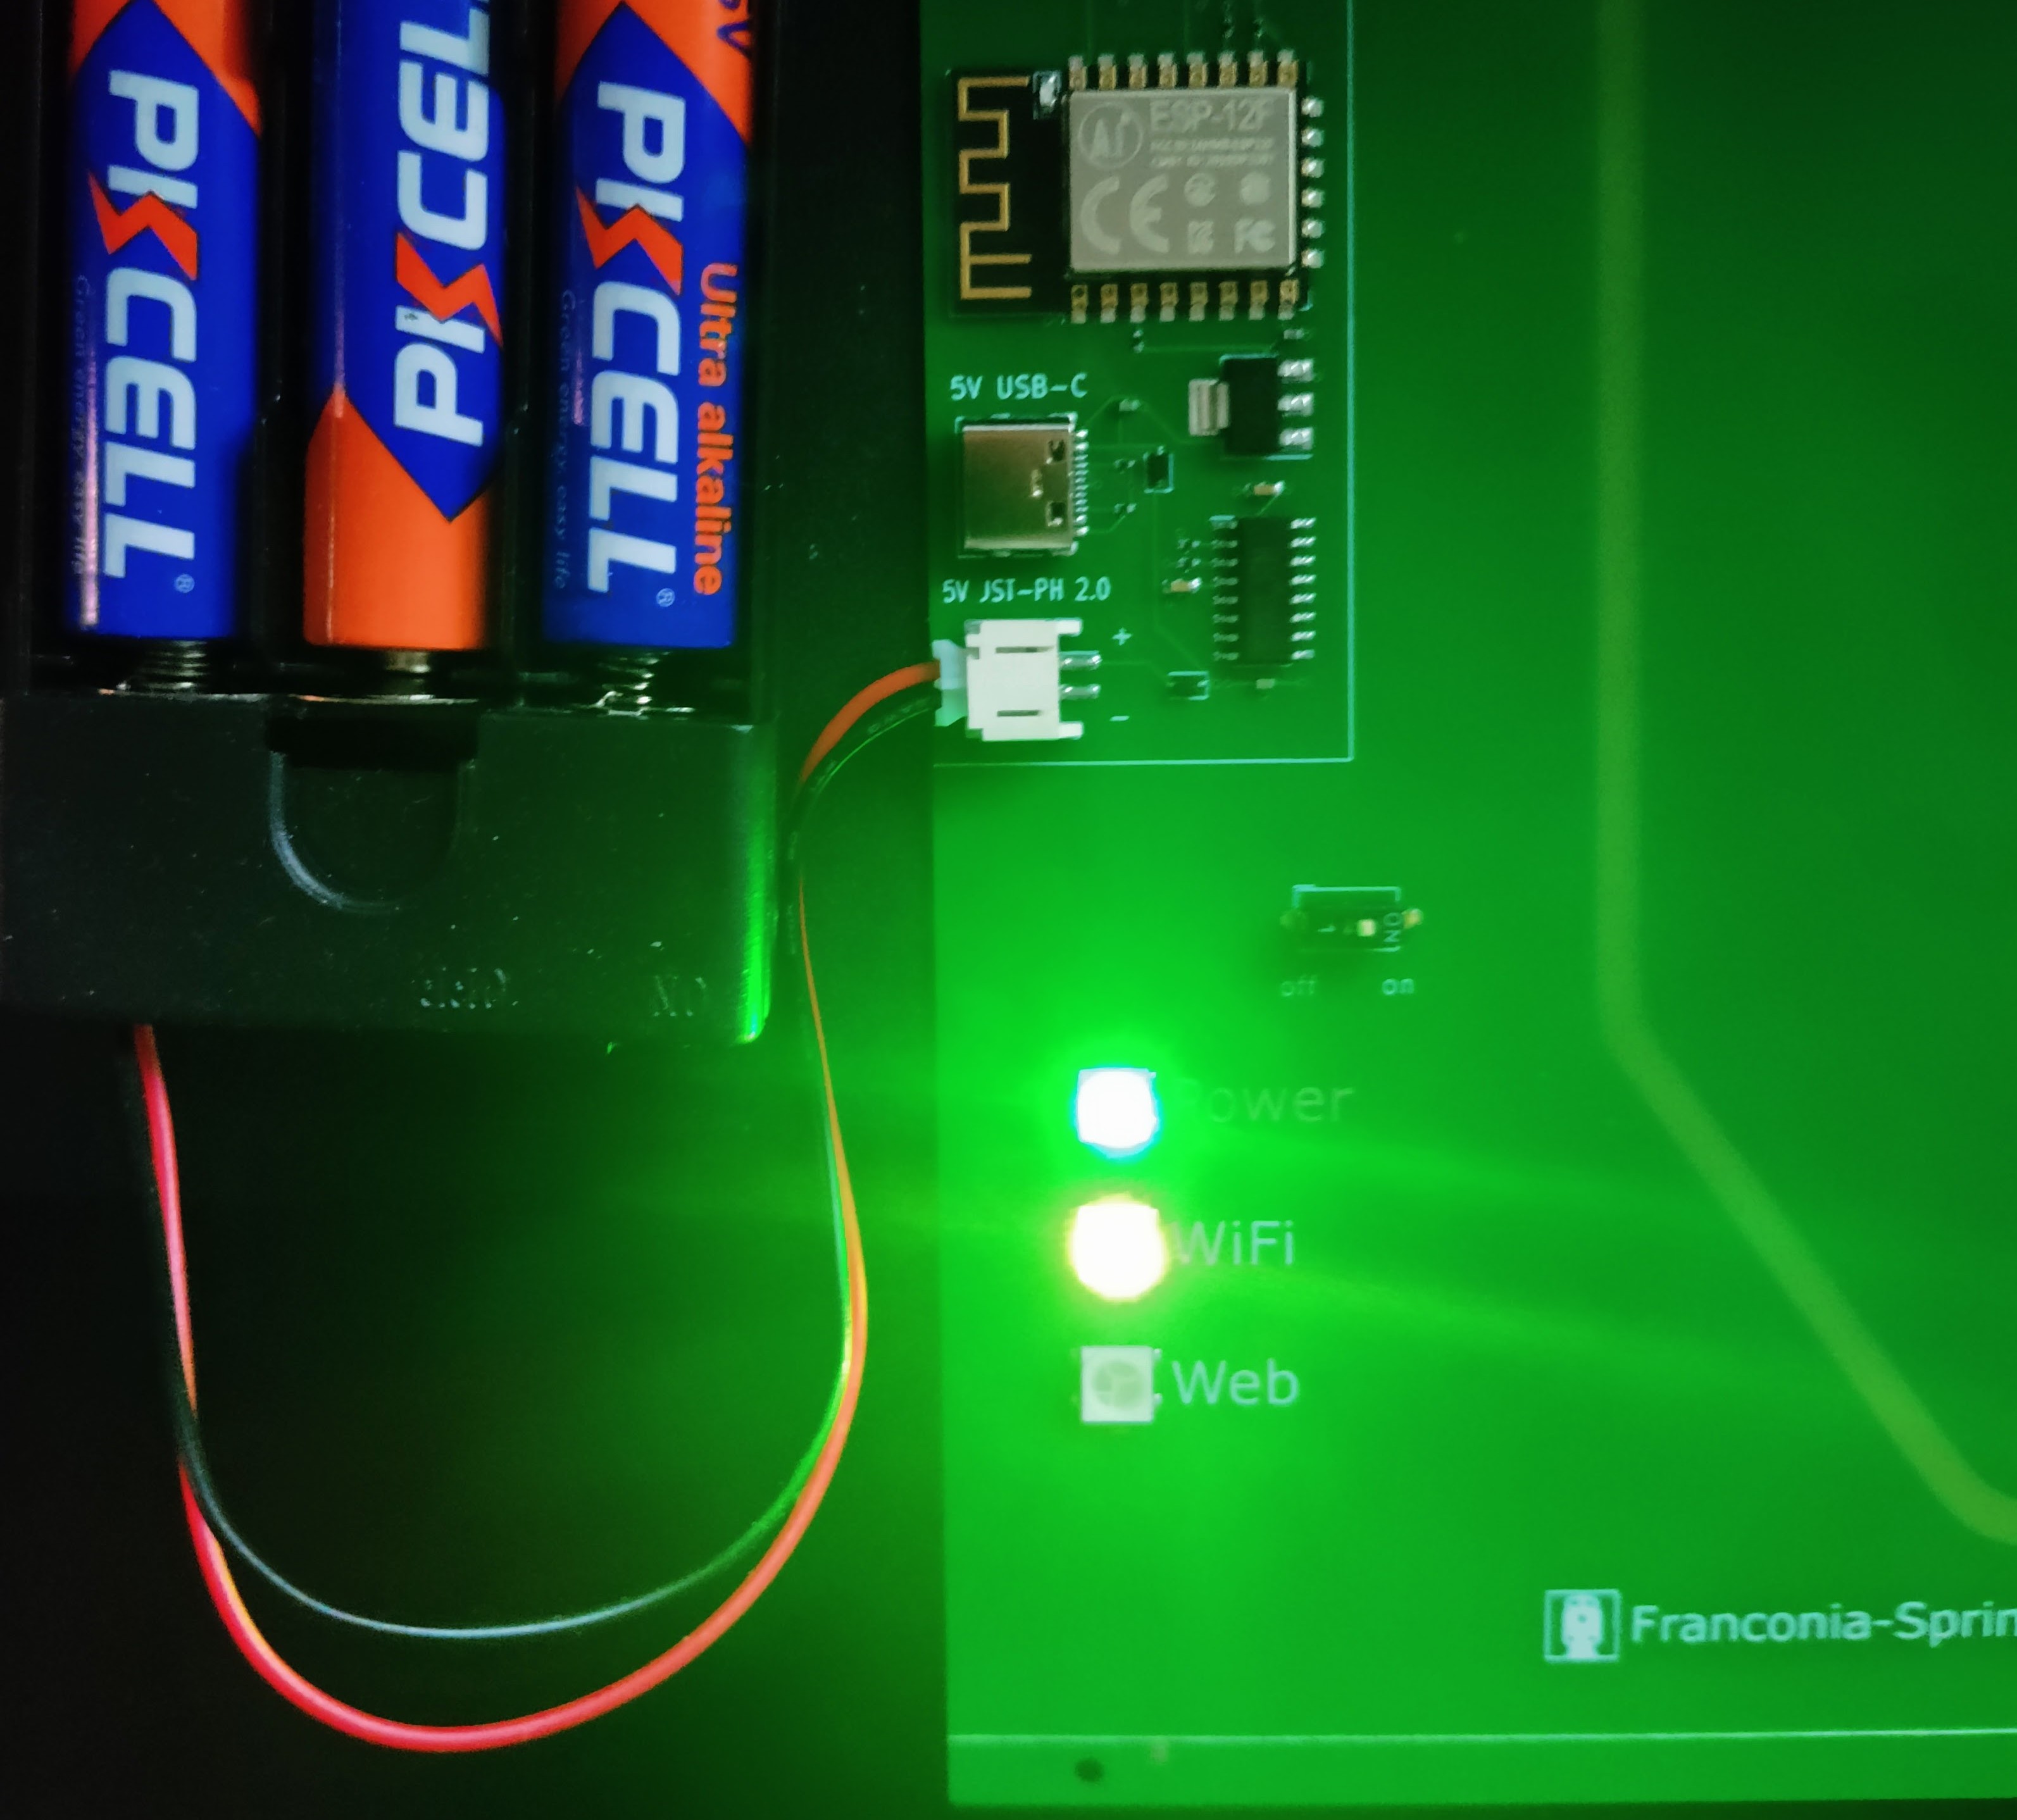
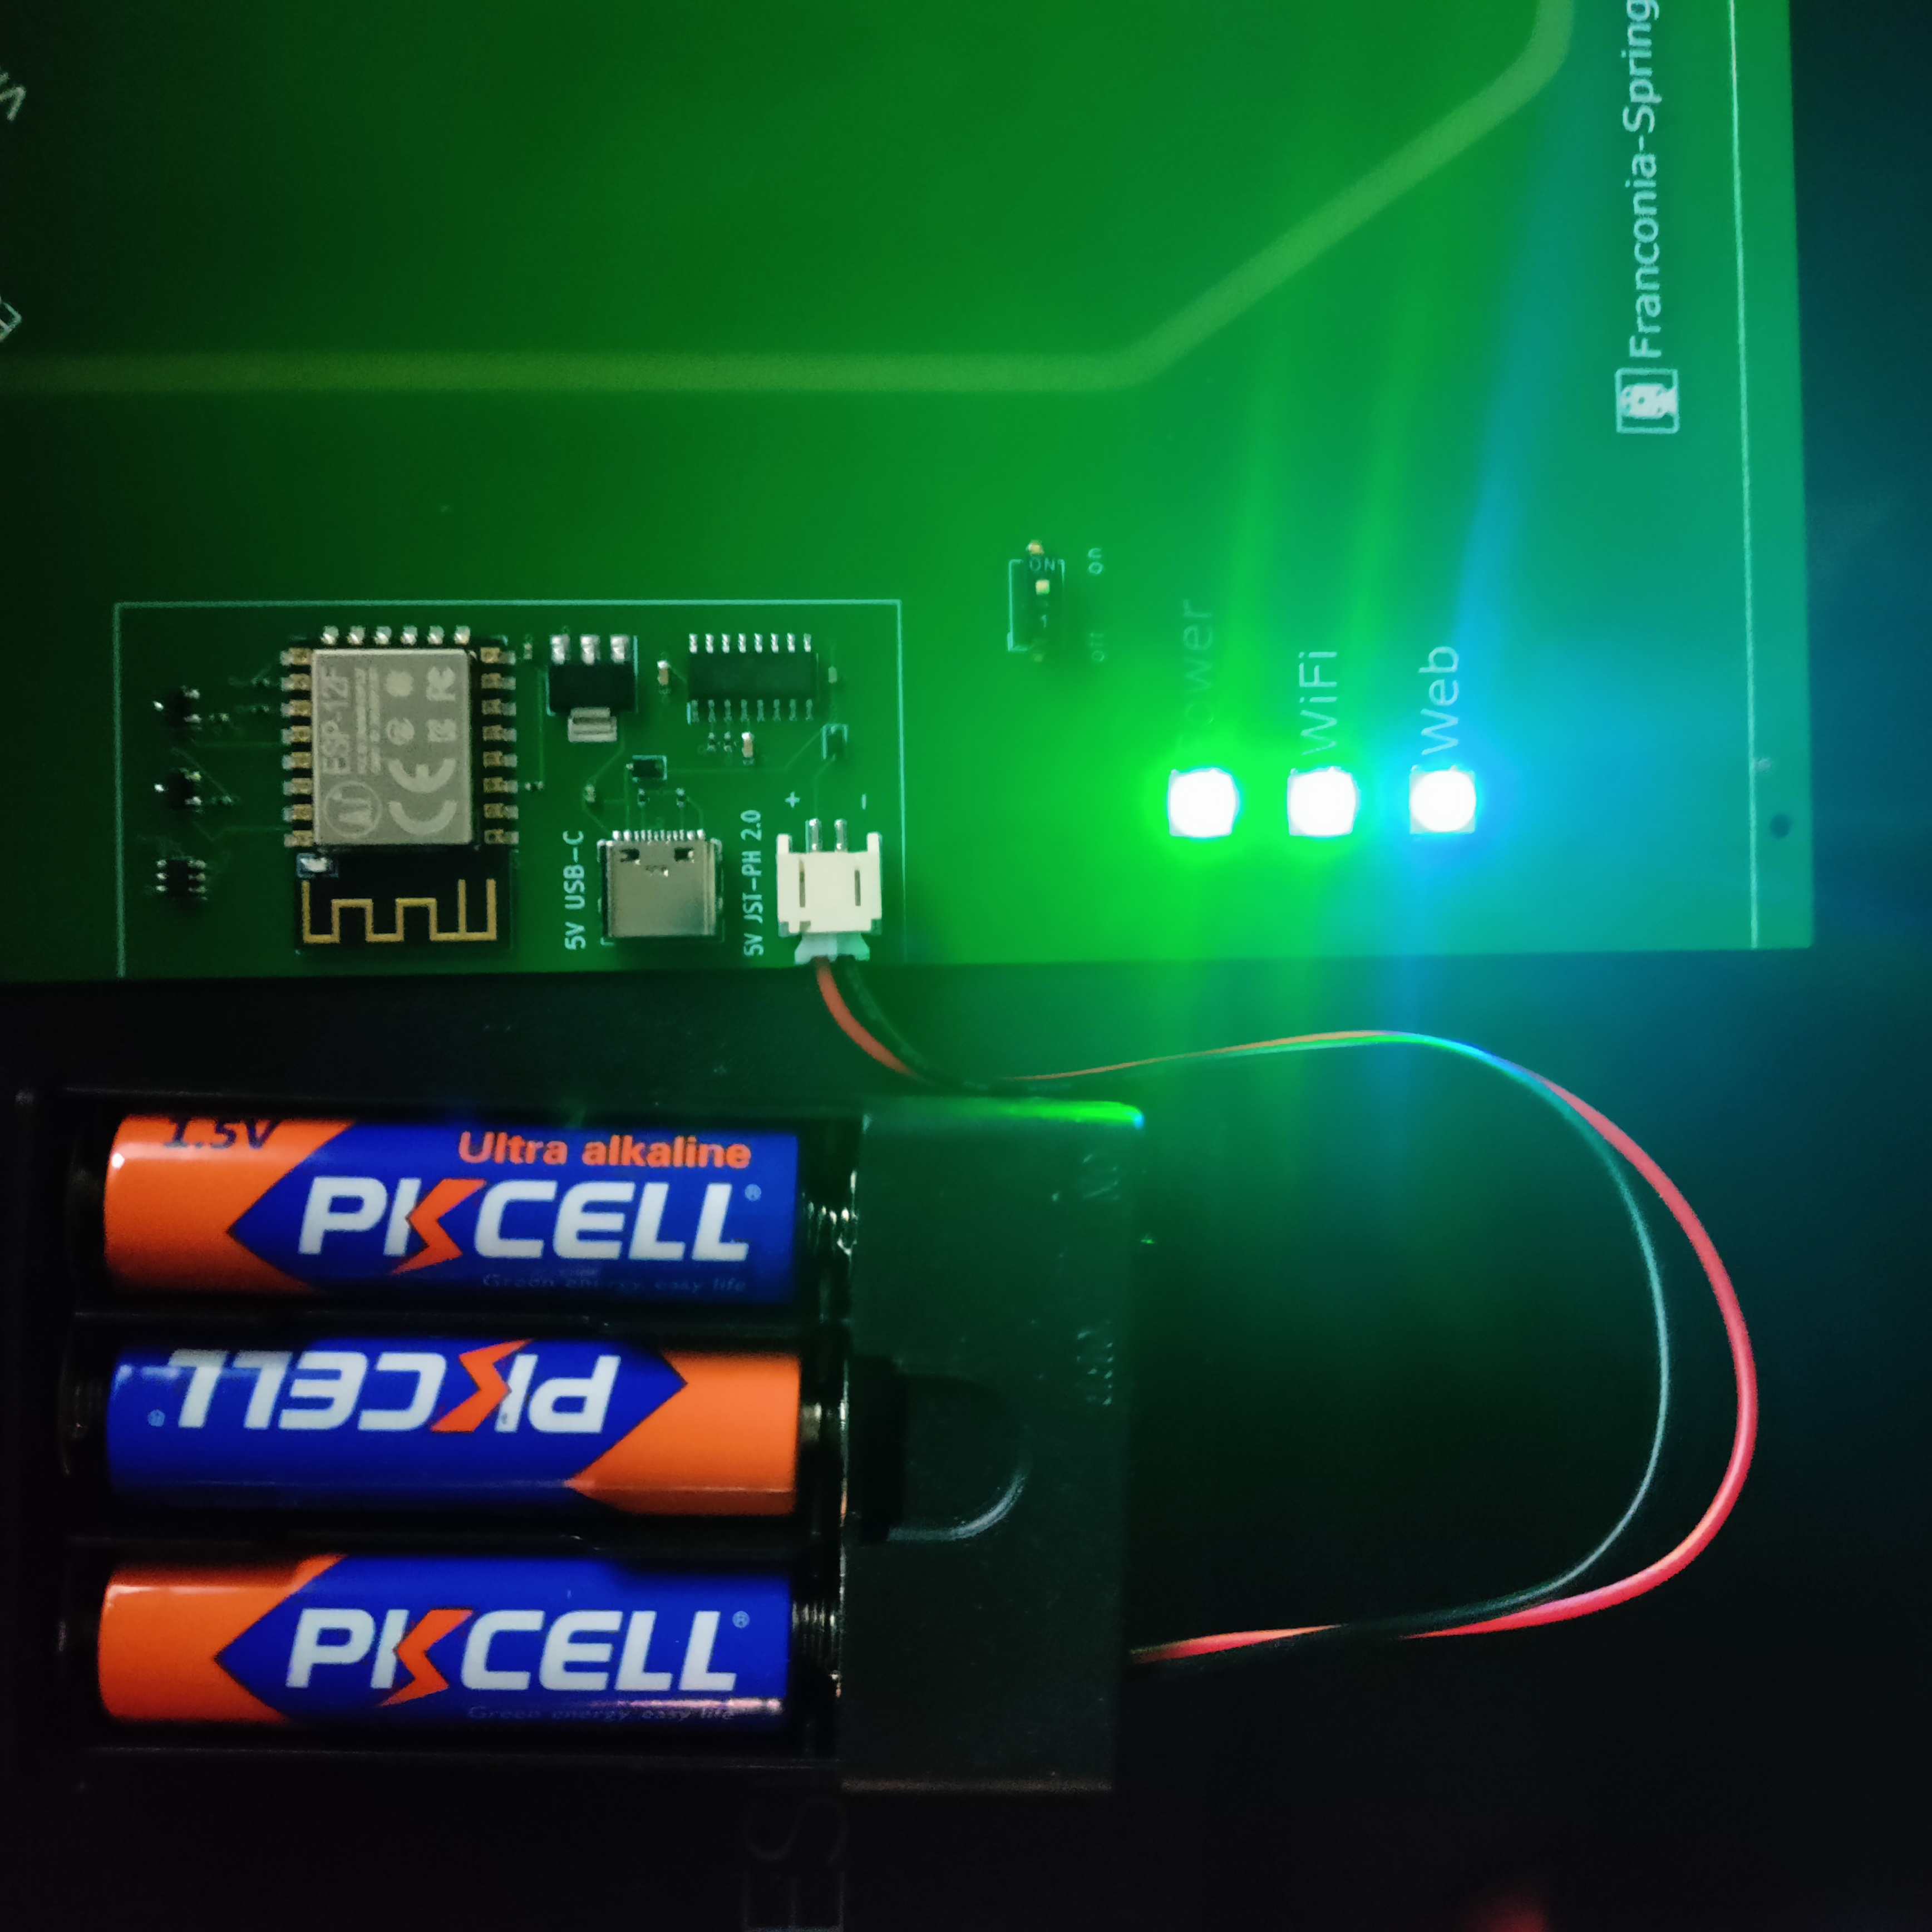
Boards can be powered with a USB-C cable or a battery with a JST-PH 2.0 connector (for older boards that have one). Either power source must provide 5 Volts (5V) of power - more volts may damage your board, and fewer volts may cause LEDs to dim or blink out.
Once connected, make sure the power switch above the LED indicators is switched to “on.” (I know, I know … but I have had to make that instruction explicit)
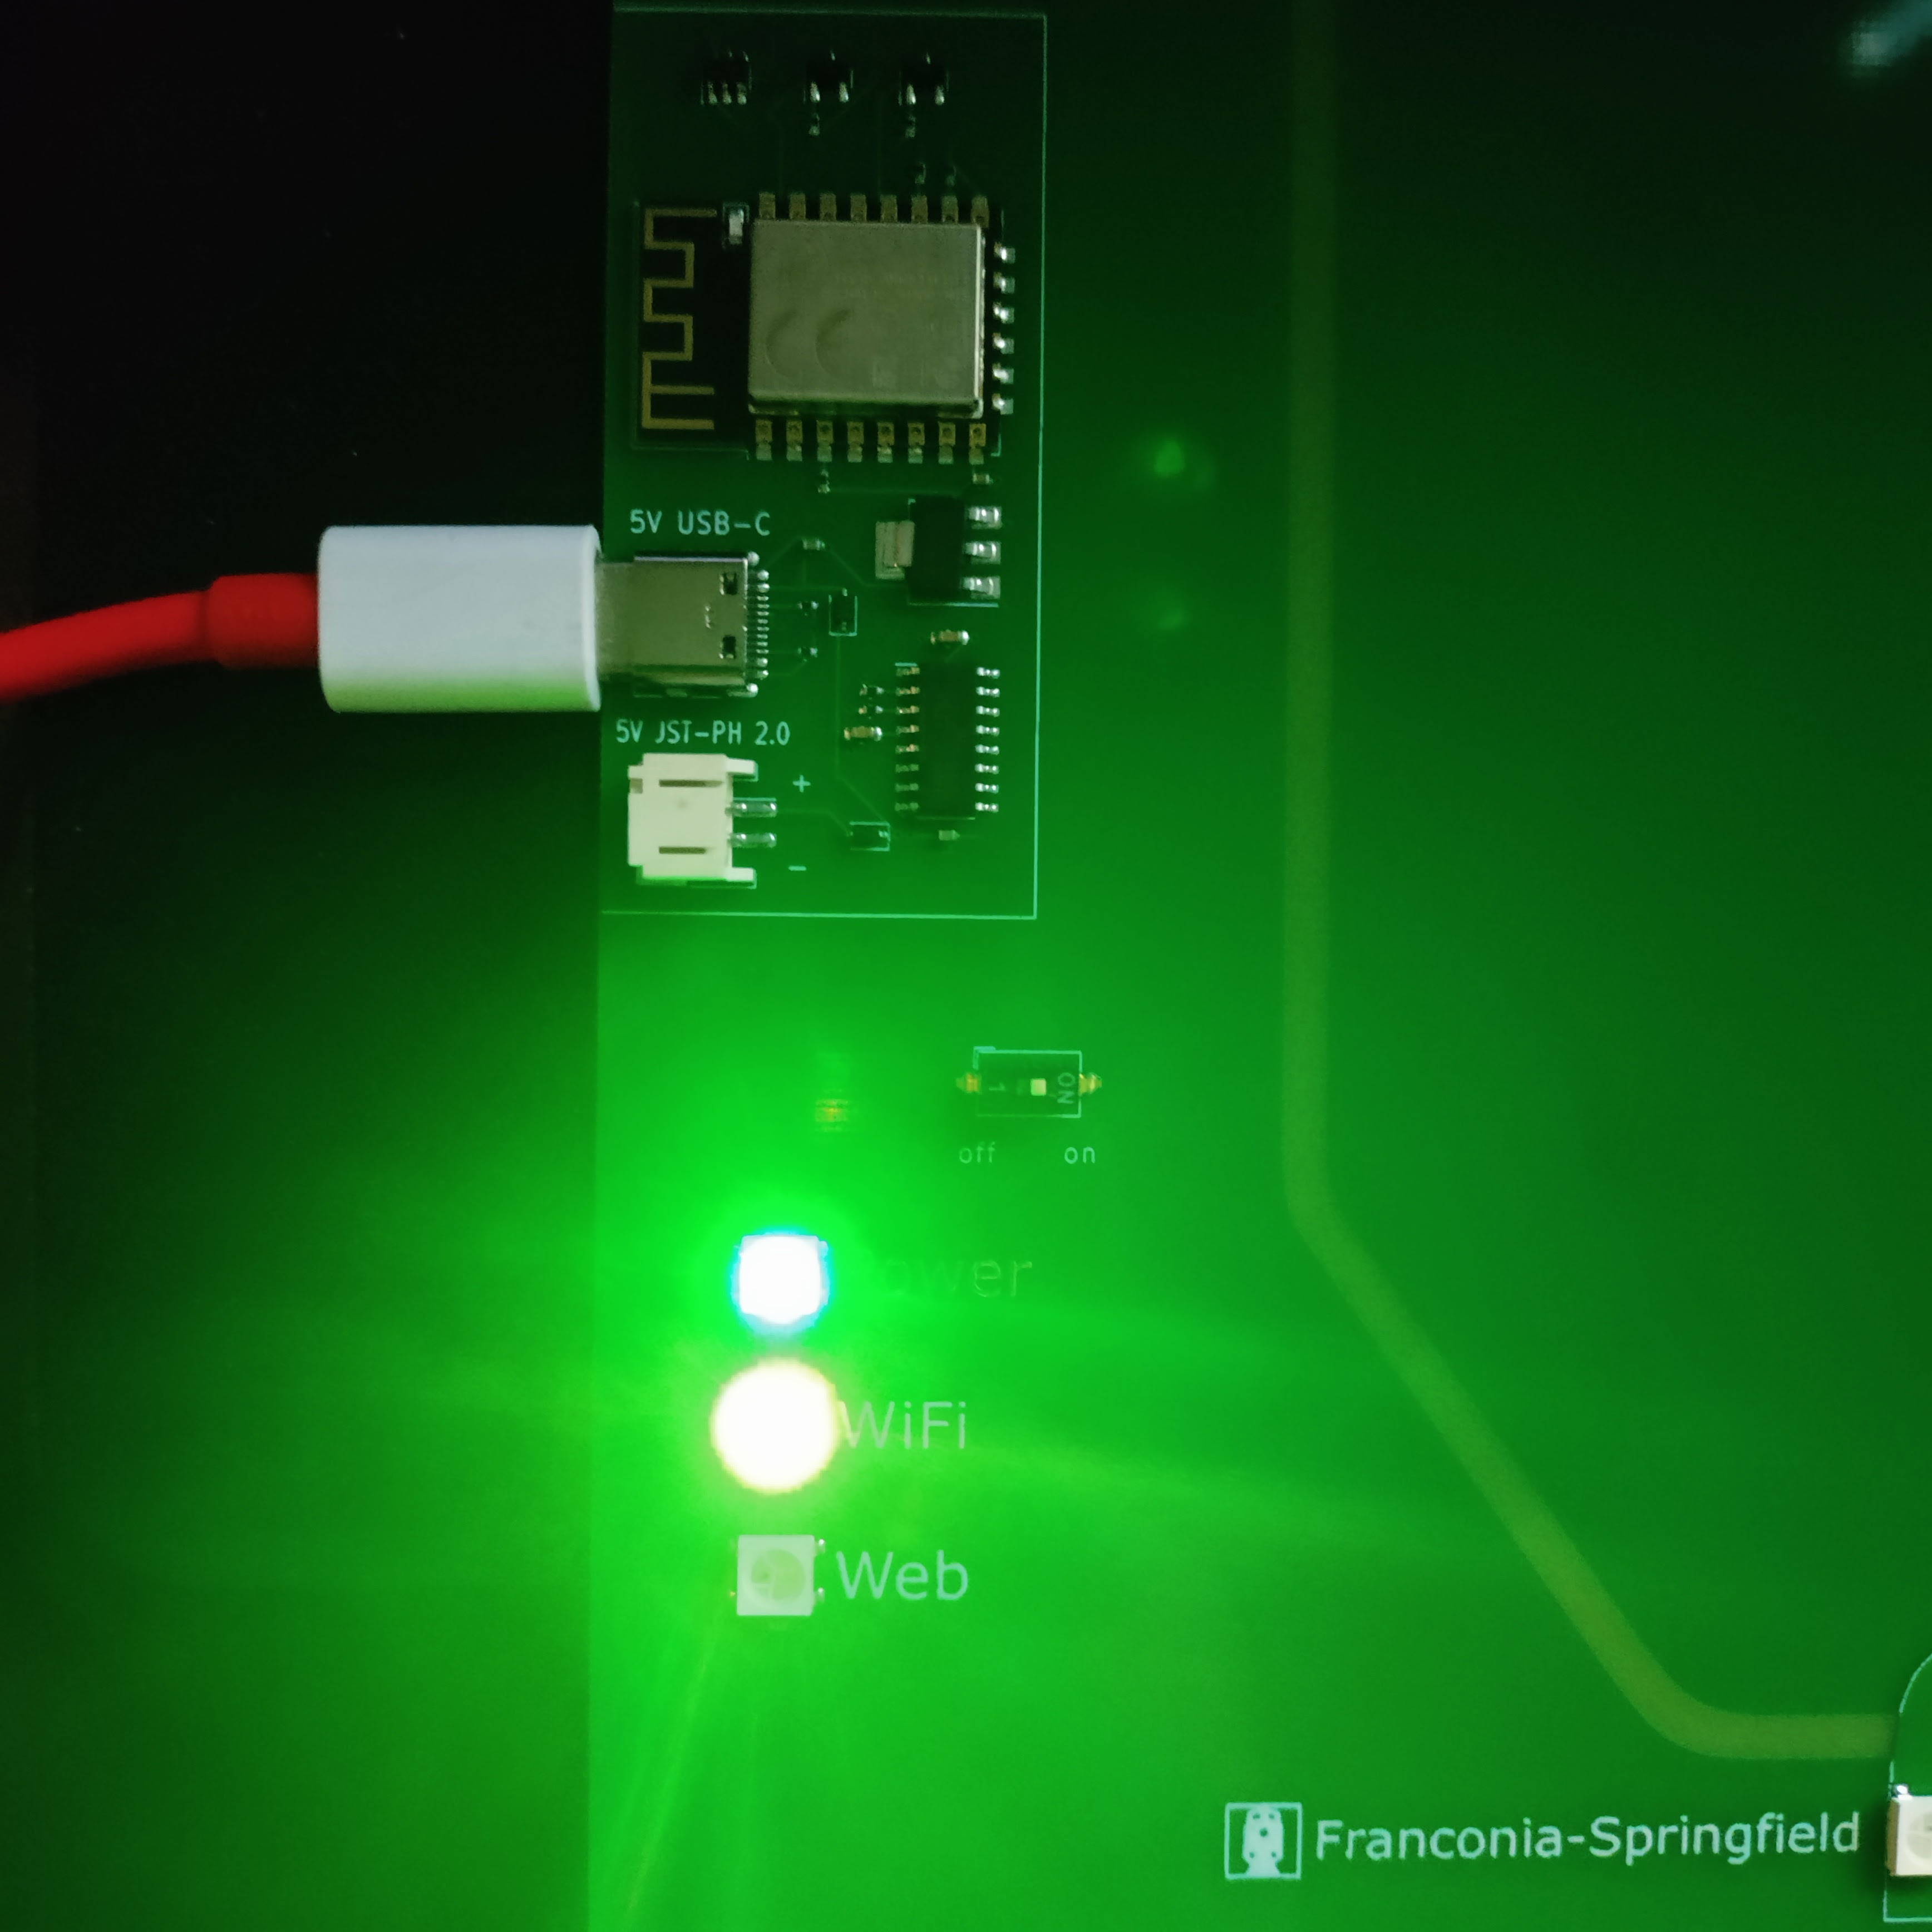
The simplest power source is a USB-C cable attached to a phone charger or computer. Be sure to check your power supply, but most chargers will provide 5V.
Alternatively, you can use a battery or alternative power supply that provides approximately 5V of power through a JST-PH 2.0 connection. For example, a 3x AA battery holder will provide sufficient power with three fully charged batteries. Caution: Batteries may drain quickly when powering the board alone. For continuous use, a stable power supply is recommended.
You may also power your board using both the USB-C and JST connections unless you have a development board (then only use one - see dev boards). Doing so should draw less power from both supplies.
WiFi
Short Instructions
The first time you turn your board on or change WiFi networks:
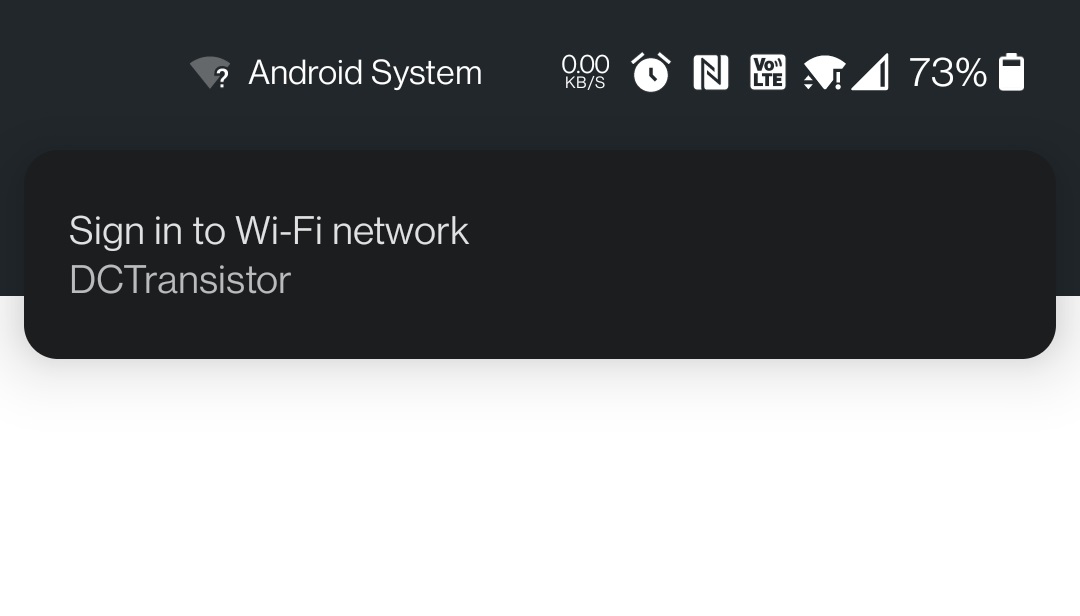
- Connect to the
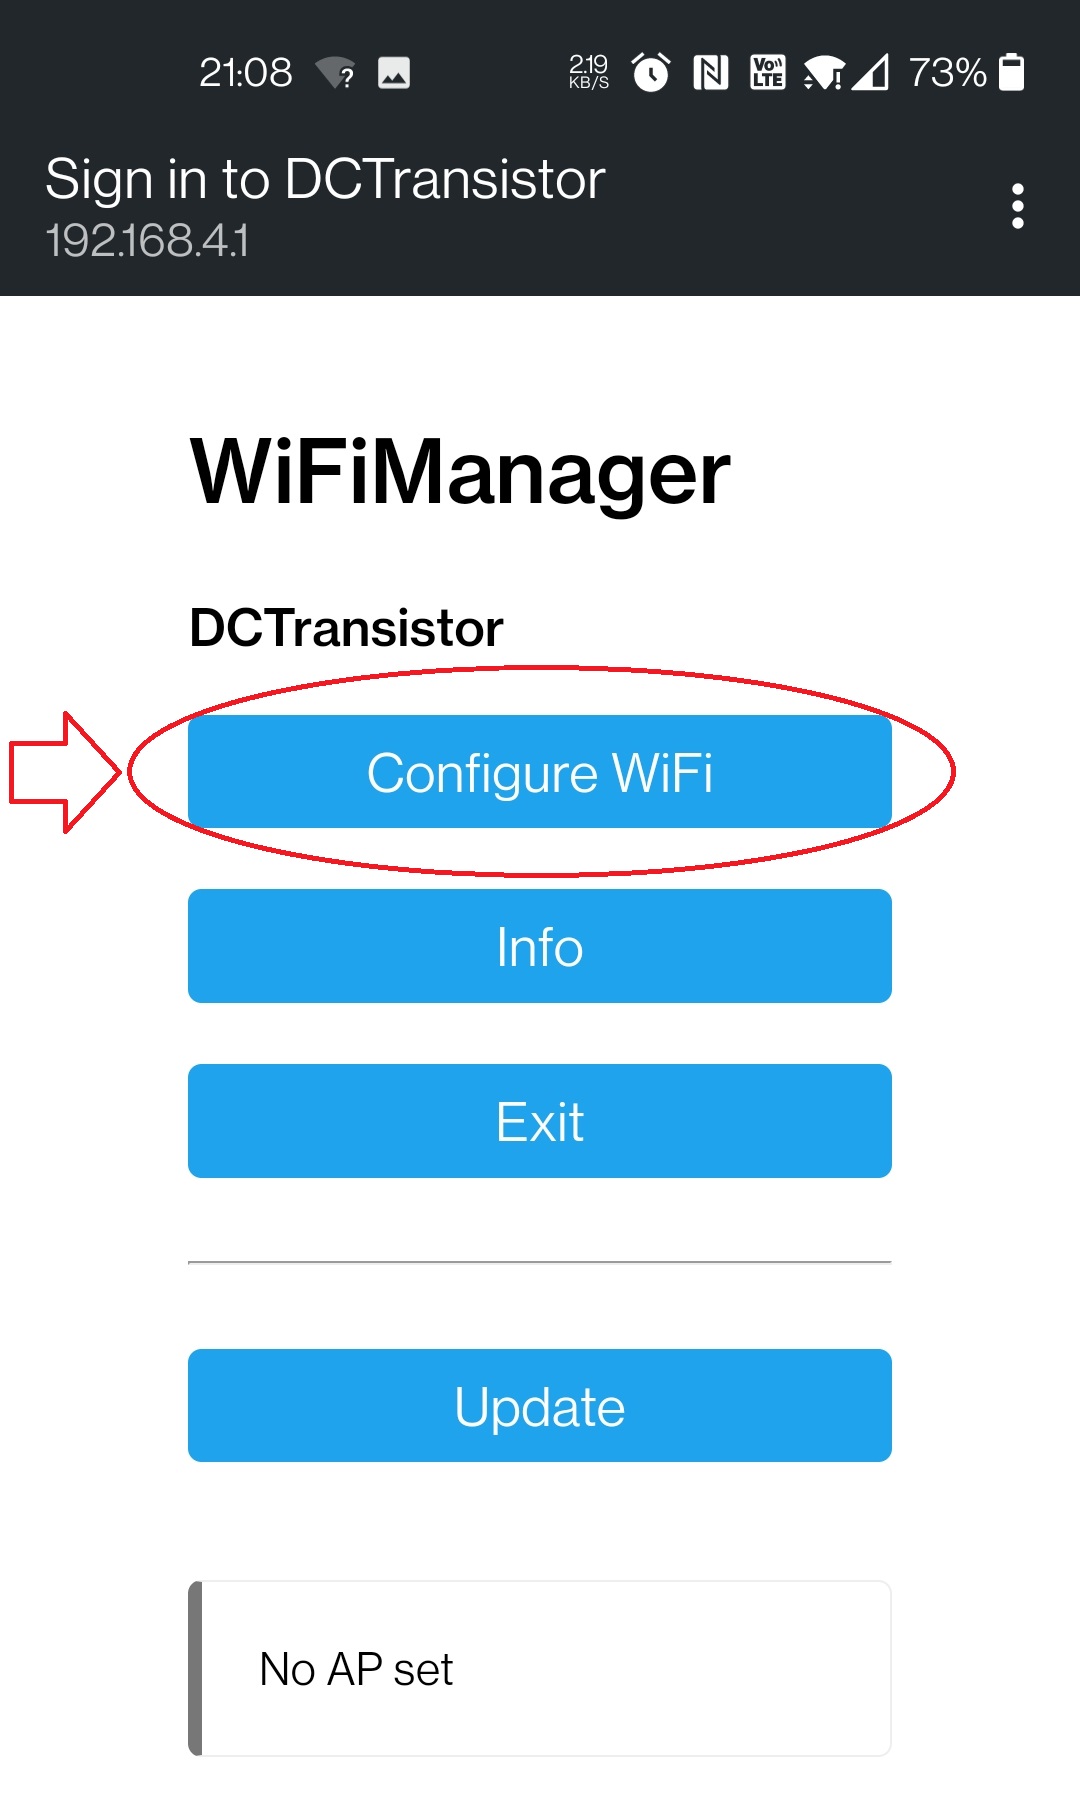
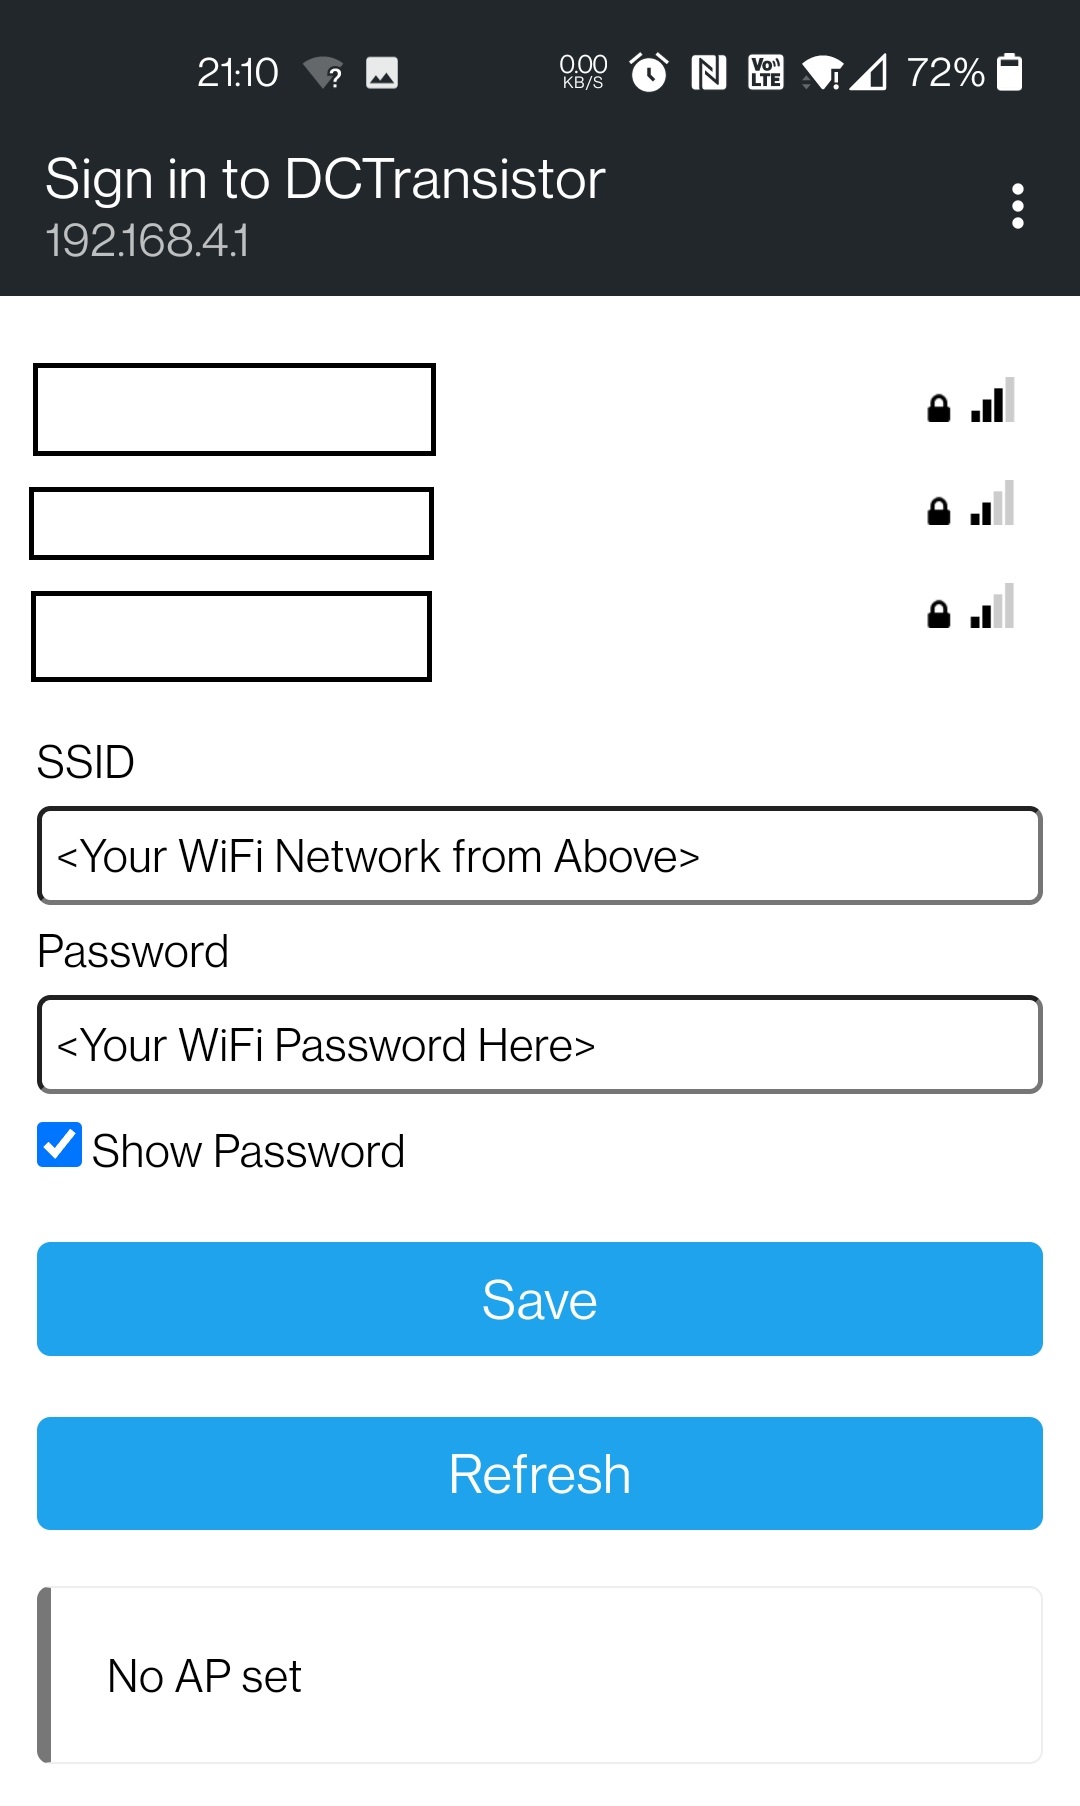
DCTransistorWiFi with passwordtrainsareneat. - On the WiFi landing page (or at
192.168.4.1in a web browser), select your WiFi and enter your WiFi password. - Wait for the board to update
Detailed Instructions
The first time you plug in your DCTransistor board, it will create a new WiFi network named DCTransistor with a password trainsareneat.
When you join the WiFi network, you should be automatically redirected to a menu option to select a WiFi network for the board to join. If you are not redirected, go to http://192.168.4.1 in a web browser.
After setup, the board will automatically connect to your network every time it turns on. If it is unable to connect to your network, it will recreate the DCTransistor network and wait for you to select a new one to join.

While it is waiting for you to connect it to your Wifi, or while it is connecting to your WiFi as it turns on, the board’s WiFi status LED will remain yellow.
Updates
The board checks for software updates every time it turns on, and will automatically update itself if there is a newer version of software.
When the board is updating, the WiFi status LED will turn blue. When it is done updating, the board restarts, the WiFi and Web status LEDs turn off, and it connects to WiFi and the Web the same as if it just turned on.
Troubleshooting
Though the board shouldn’t have any problems that aren’t quickly addressed through an update, it is possible that something may prevent your board from automatically updating itself or that an issue with the boards goes unnoticed.
If this happens, first manually install the most recent software version using the instructions under customize your board.
If the problem persists with the latest software version, send an email to support@dctransistor.com or create an issue on GitHub